This is a step-by-step guide that will show you how to start a blog and earn money with Blogger.com with complete details and explanation. Blogger is a blog-publishing platform that allows users to create multiple blogs with their account and publish articles on them.
It was started by a private entity but was later on bought by Google in 2003. It is one of the biggest blogging platforms available to users world-wide. A single user is allowed to host up to 100 blogs in their Blogger account. This limit is usually considered more than enough for all types of users.
In fact, most people usually have a single blog in their account and they do pretty good in terms of readership and the amount of traffic coming to their blog.

One of the biggest competitors of Blogger is WordPress.com which is also a very popular blogging platform. We have chosen to focus Blogger.com in this guide because it has a few advantages over WordPress. Here are a couple of advantages that matter the most for a new user:
- Blogger allows users to use their own custom domain for free with their blogs. WordPress charges around $13 to let users use their own domain.
- Blogger allows users to put ads to their blogs for free using gadgets so they can earn money with them. WordPress only allows users to put ads on their blog if they pay the fees to start a premium WordPress blog. The fees for the premium package is around $ 8 per month.
These two differences have compelled us to ignore WordPress for now and publish this guide about Blogger.com. These advantages may not be huge for regular users who are used to creating and running blogs on multiple platforms, but they matter a lot for new users who want to start their own blog from scratch and want to earn money without spending a dime.
STEPS TO START A BLOG AND EARN MONEY
Starting a blog on Blogger is actually quite easy. Before you get started you must make sure that you have a Google account. That’s a requirement because Blogger.com uses your Google account to authenticate you to the Blogger dashboard.
If you don’t have a Google account you can sign up for one HERE. If you have a Gmail account then you don’t need a separate Google account.
Once you have your Google account ready now is the time to get started on creating a Blogger account. Then we’ll see how to create an actual blog. We have compiled the information in a step-by-step guide.
Here are the steps to create a blog with Blogger:
- Register an account on Blogger.com
- Create a title and address for your blog
- Choose your desired theme for the blog
- Create your first blog article by clicking on “New Post” button
- Click on the “Publish” button to publish your first blog post
The whole process is explained in detail below:
STEP-1:
We will start by creating a Blogger account. Assuming you have a Google account the next thing to do is to register on Blogger.com. Click HERE to register. This how the Blogger.com’s main page looks like:
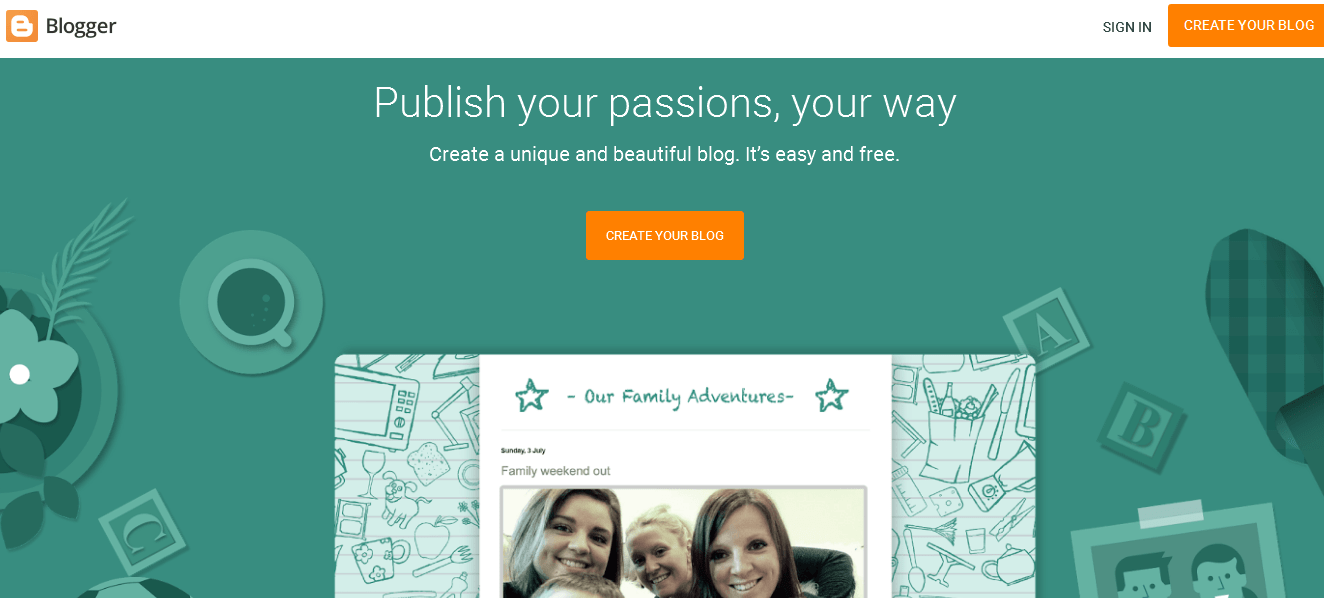
You need to login with your Google account in the login page that follows up. Once you have logged in, the next step is to start creating your blog.
STEP-2:
Once you have signed in to your Blogger account, you will be taken to a screen that looks like this:
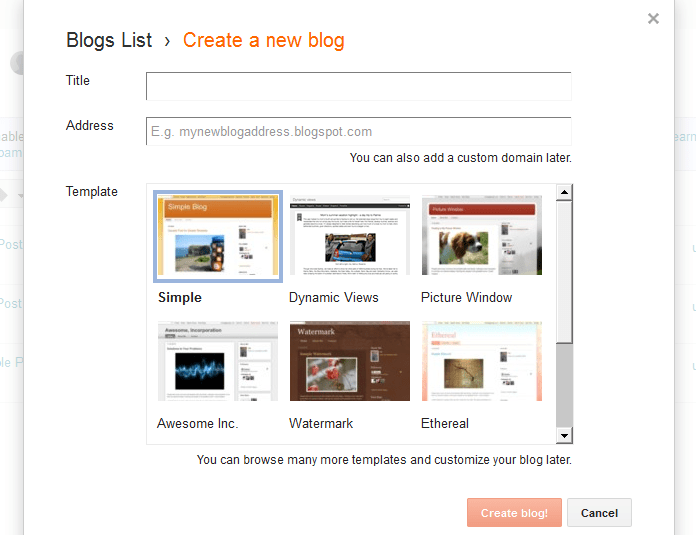
Here you will be able to create a blog for yourself. When creating a blog you should know what topic you want to focus on. A blog should be focused on a particular topic that you’re interested to write about.
Once you have decided you should pick a suitable Title and Address for your blog. The title is actually the word or phrase that you want to show on the Title section of your Blog. It will show as the main heading of your blog and it will also show as the headline of your blog on your browser tab.
The Address is the actual web address of your blog for example www.xyz.com. Blogger.com gives you two options for your Blog address.
You can use the free domain name that they provide. It will be in the format: yourblogname.blogspot.com. Whatever the address you’re choosing will be appended with blogspot.com. This will be your free domain.
However, if you want to use a Domain name that you own already then you can opt for a custom domain that you will be able to map later with your blog. As mentioned above, Blogger let’s you use your own domain name with your blog for free.
You can also select a Template for your blog. As you can see in the snapshot, there are a number of templates that blogger provides you for free. You can choose anyone that you think will suit your blog the most. After you have completed all the three requirements, you can then click on Create Blog button to create your blog.
STEP-3:
Once you have created your blog, you will be taken to your Blog Dashboard that looks like this:

This is your Blog dashboard. Here you can do the following things with your blog:
- Create Posts
- Check the Statistics of your blog visitors
- See the comments that others have posted on your blog
- Configure and check the earning details of your blog
- Create advertising campaigns for your blog
- Create pages for your blog e.g. “About Us”, “Contact Us”, “Privacy Policy” etc.
- Add gadgets to your Blog header, sidebars and footer
- Choose a specific template for your blog
- Configure Settings for your blog including Title, Custom Domain, Description, Privacy settings, Blog authors and Visitors
The GUI of the blogger dashboard is very easy. It will guide you with the whole process of setting up your blog. The main feature of your blog that you will using the most is the Create Post module.
Blogging is all about writing and publishing articles about your favorite topic. These articles are known as Posts in the blogging world. To create a post, you will have to click on the New Post button under the Posts section. Here’s how the New Post screen looks like:

The above screen is basically the Post editor of your blog. Here you can create your blog article by giving it a title and writing the whole content in the text editor below the title section.
After you have written your article you will need to publish it to be able to make it available for the public to read. To publish your article you simply need to click on the Publish button as shown in the screenshot.
HOW TO EARN MONEY FROM YOUR BLOG
This is the most important section of this guide because here you will learn how to actually earn money from your blog that you have created in the previous steps. Basically you will have to put some ads on your blog to generate money.
There’s an Ad publishing system that you can apply for to be able to make money from your blog. That publishing system is known as Google Adsense. Although it is a very popular publishing platform among Internet users but if you are still not familiar with it then that’s not an issue.
You can simply apply for a Google Adsense account and join it with your Blogger account. However, there are a few requirements before you can actually apply for an Adsense account
GOOGLE ADSENSE REQUIREMENTS
Here’s just a short summary of those requirements:
- You must have a website. Now in our case we just created one for ourselves. A blog can also be called a website because it fulfills all the requirements of a website. If you have created a blog for yourself you have completed this requirement.
- You must be at least 18 years old. You can of course create a blog for yourself if you’re younger than 18 years but you cannot earn money from it until you turn 18. That’s just a requirement of the Google Adsense platform that we must comply with.
- Your blog or website should comply with Adsense Program Policies. There are a few program policies that you need to adhere to if you want to apply for an Adsense account. You can read about those policies here.
- Your blog / website must be active for at least 6 months. Yes, unfortunately that is a requirement and your blog is not qualified for an Adsense account until it has been operational for at least 6 months old. But if you look at it in the long term, it’s not a big issue because in this period you will have the time to focus on your blog and publish good quality posts on it. And obviously your Adsense ads won’t be able to generate a decent amount of money unless you have a good number of readers and visitors on your blog. So during those 6 months you should really focus on writing and publishing high quality articles and bring as much readers and visitors to your blog as possible. When that waiting period is over, you will immediately start to earn money when you place the Adsense ads on your blog.
HOW TO INSTALL GOOGLE ADSENSE IN BLOGGER
Now here are the steps that you need to perform to apply for an Adsense account:
- In your Blogger Dashboard go to the Earnings section as shown in the image below:
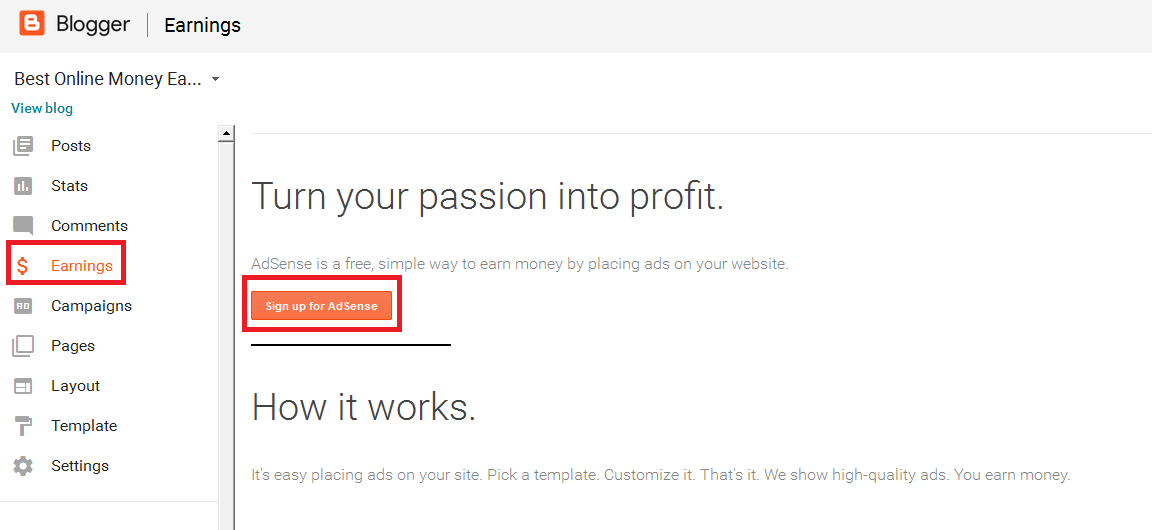
In the earnings section you should be able to see the Sign up for Adsense button. If you see another message that says Your blog doesn’t currently qualify for AdSense then this means you need to wait for the 6 months before you can apply for it.
2. Assuming you are qualified for Adsense, when you click the Sign up button you will be taken to a screen like that looks like this:
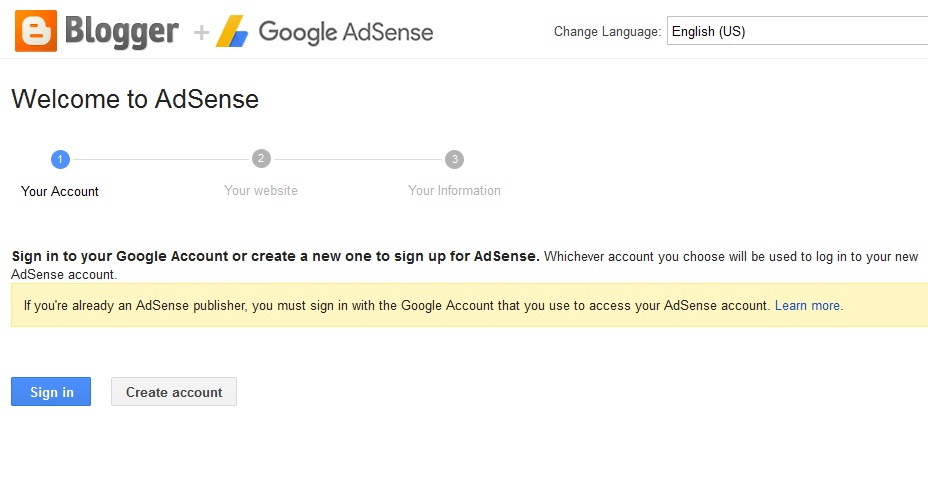
CREATING ADSENSE ACCOUNT
To create an Adsense account you will have to click on the Create Account button. After this you will be asked to enter your personal, residential and payment information to complete your Adsense registration.
You will need to carefully fill out those details because you want to be able to receive your earnings without any problems. So once you create your Adsense account, now it’s time to put the Adsense ads on your blog so you can earn money from them.
If you need further details about how to setup Adsense you can read our other guide focused on making money with Youtube here.
3. To put Adsense ads on your blog, you need to go to the Layout section of your blog dashboard. In the Layout section, you will need to add gadgets to your Blog’s sidebar or Footer so you can display the ads there. Here’s how it looks like:

4. Click on the Add a Gadget button to add a gadget on your sidebar and put your Google ads inside it. When you click the Add a Gadget button you will see a screen as shown below:

EARNING MONEY FROM ADSENSE
As shown in the image above you need to select the Adsense option and add it in your selected gadgets. That’s how you integrate Google Ads in your blog to start earning money from them. It is important to note that you can only earn money if your readers and visitors click on the ads displayed on your blog.
The amount of money you can make through your blog depends on the number of clicks you get on your ads. Bloggers who are able to generate a good amount of traffic on their blogs can earn even more than a thousand dollars per month. But that only depends on how much effort you put into your blog.
CONCLUSION
Creating a brand new blog for yourself and configuring it to be able to generate income is as simple as described in this guide. The whole process of creating a blog and signing up for an Adsense account is pretty easy. The hardest part is consistency and actually being able to earn money by turning it into a profitable source of income. More than 90 percent of bloggers are not able to keep up with the pace they started and only a small portion of those bloggers actually achieve success in making their blogs profitable. BloggingTips has published a nice list of top blogs and websites on the internet. You can always check that list to look for successful bloggers and learn from them.
Almost all successful bloggers share some important traits which are consistency, patience and a passion for writing. If you have those characteristics then you will one day surely count among the successful entrepreneurs.
Hopefully we have covered a good detail for you to start a blog and earn money with Blogger.com. If you still have any questions don’t hesitate to ask us through our Contact Us page.
Have something to say about this article? Comment below or share it with us on Facebook.
Spread the Word
ydt
The best Freelancing Job Teaching School of online. The freelancer can easy earn money online at home.
Thanks!
A very clear and concise post. Excellent, thank you.
In your experience can you add affiliate links to cpas, clickbank, amazon and other places people can buy products? Or will you end up getting banned?
Yes you can definitely add those links as long as they don’t look spammy. Too much affiliate links gives a signal that the blog only cares about money rather than sharing credible information.
Thanks for teaching us as a teacher, I am really appreciated with your content as you have described begin to earn from sources.
Thank you.
Life time earning opportunity app: – goo.gl/k7hSXE
thanks <3
what a great site Oh my God, that is a very awesome resource for all the new and pro bloggers. Thanks for sharing.
this is a great post very informative, i say this book on the post which i got :https://goo.gl/6PzQtW it was a very good book which has guided me with my blogging career now as it is , i suggest you go out there and get this book to start earning now.
hey this was a good post keep it up
hi, my ad sense account was made after 15 days. is it because of my you tube channel which has been active for a year now?
But the problem is that i m doing everything i can to place ads. I tried so many things but the ads are still not showing. What should i do? Help
This maybe the solution you’re looking for:
http://www.proandtech.com/2015/07/fix-ads-not-showing-on-your-blogger-blog.html
If it helps you kindly let us know. This might help other readers as well.
I had heard a lot about writing blog but at a loss of how I could do it for my own. Your step-by-step instructions are very easy and helpful. I am really indebted to you for your great effort and time on writing this article.
Thank you for such sweet words. I am glad it has helped you.
Your Guidance Is Very Useful. It Really Helped Me
Ty. Helpful
Hi um the earnings section is not there anymore here in 2021. Is there still a way to get a google adsense account and link it to blogger?
Hi. You can also leverage affiliate marketing and use affiliate links to earn commissions when someone purchases something from your links. Here’s a nice guide that explains how affiliate marketing works: https://www.webemployed.com/what-is-affiliate-marketing-how-it-works/
How much do they pay? Per stat
This is very clear tutorial for those, who want to start their blog on Blogger. They can get all the information, without going to anywhere else.
When I started blogging, I started to write on Squidoo and then I moved to Blogger Blog. I learned a lot here and also made money with Amazon affiliate program
Then I moved to WordPress and I’m happy there.
Thanks for such a detailed information.